Showing posts with label DIY. Show all posts

Monday, December 12, 2011

$9 DIY Easy-Sew Ruffled Tree Skirt

Have you seen the prices they are selling tree skirts for?  It’s insane!  I’m not a big fan of theme-y or orverly ornate tree skirts, which are logically priced higher because they involve more work.  However, even a simple tree skirt at any store I could find was at least about $50 or more.  I said, “No way, no how” and did a little thinking and searching around online.  Many bloggers have gotten crafty and have DIY-ed a tree skirt.  Mine is nothing spectacular, but I like to share what I’ve been up to, so I’ll post the details and steps.

I wanted a neutral tree skirt with a little bit of interest, so I went with a white ruffled one.  I picked up one and half yards of 90” white cotton fabric for about $8 and bought a white tree skirt at the dollar store.  $9 out of pocket – not bad!

Here is the tree skirt before:

skirt1

I ripped the fabric in about 8”x90” strips and sewed the edge to make it look nicer after ironing it down.

skirt7

Then, I flipped the dollar store tree skirt over so that none of the leaves would show through my white fabric and decided where I wanted the outermost ruffle to land so that it would hang over the tree skirt edge below it.

skirt2

I used a pen to mark the starting point at the slit.

skirt3

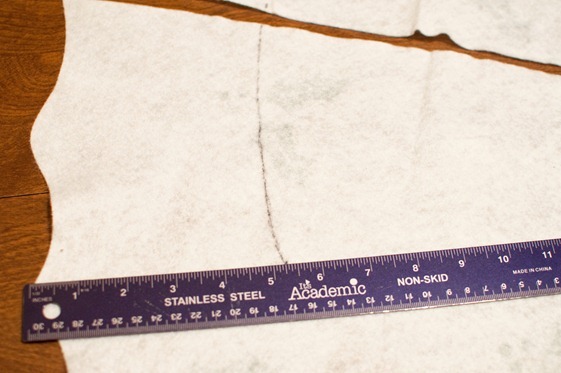
I then measured how far from the edge the mark was and went around the entire circumference marking the points and connecting them in a smaller circle.
skirt4

I did that until I got all the way around.

skirt5

Then, instead of using a basting stitch to ruffle the fabric, I simply bunched it up right as I was sewing it to save time and thread.  I would stop every few inches, scrunch up the fabric, sew, and then repeat all the way around the circle.  I used the line as a guide.  I had trouble taking a photo of it, so I just showed the ruffling part, but I really sewed it all along the line I had marked.

skirt6

When finished one piece of fabric in the middle of one row of ruffles, I would add another by ruffling it with another piece so that they were slightly overlapping, making sure that the ruffles would hide the slit between the two fabric strips.

I added each inner layer by repeating all the steps.  I would measure where I wanted the next piece to lay, add marks around the circle, connect them, and sew along the line.

When I got to the outer layer, I flipped the whole tree skirt over, ruffled it and sewed it on the back side, and then flipped it through the whole back to the front and laid it flat.  I did this so there would be no visible stitches on the front, even around the small circle.

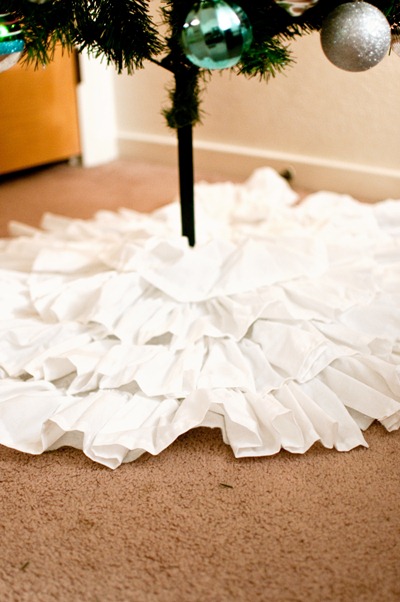
Here is the final product:
skirt8

And with the tree (I had to sneak in a photo of our tree – I can’t get enough of it!):

skirt9

I must say, for a couple hours of work and only $9 out of pocket, this tree skirt may be one of the best money I’ve ever spent!  I’ve been told a couple times that it looks store-bought, which I believe is a compliment.  I’m absolutely in love with it.  I hope to still have it and use it in a couple years when we can lay a little baby on there and snap away.  Can’t wait!

Have you gone the DIY route this Christmas because you can’t stand the prices stores charge for certain items?  What does your tree skirt look like?

Linking to: Centsational GirlHouse of HepworthsBower Power

Wednesday, December 7, 2011

DIY Christmas Cookie Cutter Ornaments

When planning for our Christmas tree, I really wanted to include something handmade on the tree.  When I saw this Martha Stewart ornament idea, I knew I had to go for it.  It involves scrapbook paper and Christmas cookie cutters, both of which are right up my alley.  Since Mr.  Converse Sneakers and I are both big foodies, cookie cutters feel right at home anywhere in our home, even on our Christmas tree.

I picked up two inexpensive sets of metal Christmas cookie cutters from Target and some Christmas-y scrapbook paper from Michaels.  We already had the thin white ribbon and tacky glue.  What a cheap project!

ornaments1

I strayed from the tutorial and started by tying the ribbon to the top of the cookie cutters first.  I knotted them once close to the cookie cutter and then again at the ends of the ribbon to create a big hole for them to be hung with.

ornaments2

As I tied the ribbon on each soon-to-be-ornament, I laid them out on the papers to make sure I would have about an even number of each ornament.  I tried to choose paper that would fit the cookie cutter shape.

ornaments3

After I had the ribbon an each cookie cutter, I traced them . . .

ornaments5

. . . and cut their shape out.

ornaments6

On the cutter side, I went around each cookie cutter with tacky glue.

ornaments7

Then I carefully added the scrapbook paper (upside down so it would show through from the other side) and let them dry.

ornaments8

Look how cute they turned out:

ornaments9

And here’s my little gingerbread buddy on the tree:

ornaments10

Here’s a closeup of a silver glitter polka dot mitten as well:

ornaments11

Mr. CS and I both love these ornaments, both because they are extremely cute and because they were made with lots of love.

Making these was a great way to de-stress before one of my major teaching tests.  I hope I passed!

Are you doing any DIY projects for Christmas this year?

Linking to: Centsational GirlHouse of HepworthsBower Power

Wednesday, November 2, 2011

Pinterest Challenge: Changing Shades

I am extremely excited to be following Katie Bower and Sherry/John Petersik this time around during the second Pinterest Challenge.  You can read the details about it here.  You can view my Pinterest boards here.

Print

Unfortunately, the timing was not perfect.  If they had only announced it a week earlier before we decided to switch to an all cash budget, I would have swiped our debit card many times to come up with the perfect Pinterest Challenge entry, probably leaving us with nothing to eat, but now that we are spending our money wisely, I had to scale down my plans.  I looked around our house for something that I’ve been waiting to makeover and saw this:

lamp13

Actually, there are a few things in the photo I would love to change, but the lamp is the culprit this time around.  I’m not a fan of light walls like ours because I like white to balance color.  I generally do not like large canvases of white, but draw toward large canvases of light colors with pops of white and darker tones throughout the room.

lamp1

Since we can’t change the color of the walls, I am working to bring more color into the room in other ways.  Our lamp shade pretty much blends right into the walls, so I wanted to fix that.  I set out to change the shade of our shade.  Get it?

I searched Pinterest for some inspiration and came up with this:

lampinspiration

I know it’s not anything spectacular, but once again I was on a tight budget with little time to become inspired, so I chose to cover our lampshade with fabric.

Well, actually, since our lamp shade was much larger on the bottom than it was on the top, making it difficult to cover with fabric, I picked up a drum shade on clearance for a little over $13 at Target.

lamp12

This is the fabric my hubby man and I actually agreed on (that was a first):

lamp11

I started by trying to center the pattern on the shade.

lamp2

Then I glued one side down in the seam of the shade and glued the other side as tightly as I could, however there was a gap since this shade has a one inch difference between the top and bottom diameters (it’s not a true drum shade where both diameters would be equal).  I fixed this later.

lamp3

I glued the top around the edge of the inside.

lamp4

Then, I fixed the gap in the fabric along the top.  I took out the part I glued first since the bottom was glued around the edge and holding everything in place . . .

lamp5

. . . and then I pulled the left side as hard as I could so the top that is an inch smaller was snug.

lamp6

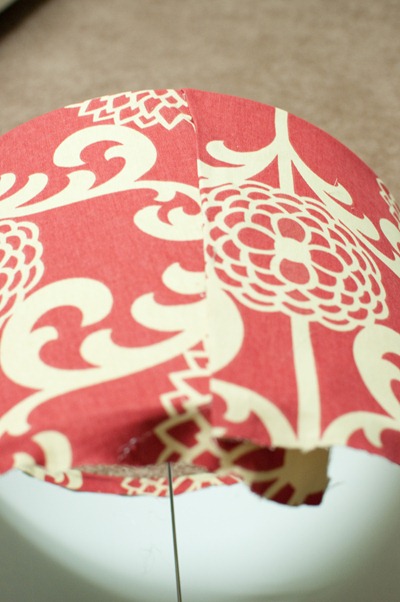
Then I glued it down and the right one on top of it in a straight line so nobody would be the wiser.

lamp7

I then glued the top around the edge on the inside of the shade, cutting a slit wherever the wire connected.

lamp8

I plan on adding white ribbon over the parts glued to the inside of the shade because it is visible to anyone in the room if they are standing up, but I did not have white ribbon when I was making this.

Voila!

lamp9

Here it is in the room:
lamp10

I tend to need a few days before I like any changes I make, but Mr. Converse Sneakers likes it, so I’m hoping in time I will, too.  I like that it’s a pop of color, and if I decide not to like it, we still have the old shade.  I could even cut off the fabric and use it for something else, but I’m hoping it will grow on me.

What do you think?  Did you join up in the Pinterest challenge?

Make sure you stop over to the fab four challenge leaders this time around: Katie, Sherry and John, Ana, and Erin.

Tuesday, October 25, 2011

How To Overcome the Pants-Are-Too-Long Blues

I’ve joked for many years that the one child my parents had turned out to inherit all the “bad” traits.  I’m referring to my horrible eyesight (from Dad), my muscular calves that I’ve never liked (from Dad), my red hair and pale skin (from both or neither, I guess), my short eyelashes (from Mom), and so on.  I’m kidding, of course, because I have learned to love most of these things or deal with them, but it is fun to play-complain from time to time.  Something that I don’t normally complain about, however, is my height.  I’m what people like to call “petite,” although I suppose I’m just at the cut off point.  I’m about 5’3”, which bothers me sometimes when I can’t reach something or when people mistake me for a 14 year old (although the red hair and freckles don’t help, I’m sure), but I usually like being small.  If I weren’t this short, I don’t think I would have agreed to go on a date with my now-husband who claims he is 5’4”, but I’m pretty sure he only beats me by a centimeter.  The one thing I hate, though, about being this short is that finding a pair of pants that fits is practically impossible.

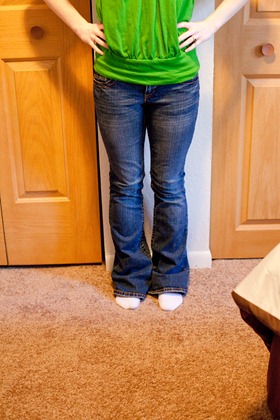
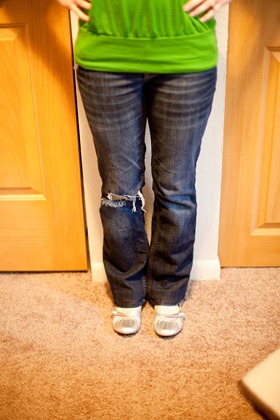
Proof:

before3before4
before1before2

Okay, well, I suppose people who like to spend lots of money on clothes (which is totally fine, but just not me) could find me many pairs of pants that fit me perfectly, but I like to buy my clothes as cheap as I can get ‘em.  For the past few years, I don’t think I’ve spent more than $12 on a pair of pants, and even that is up there.  I really like the fit of many jeans from Aeropostale and they typically are netural in design so they can last a long time.  However, the ones that fit me the best are “regular” length.  When I move down to the “short” length, they refuse to cover my back side (if you know what I mean), which makes no sense to me because I thought they just made the pants longer.  Apparently I have the butt of a “regular” person and the legs of a super short person.  Who knew?  So, I end up buying the longer pants and either cuff them (which I hate because it doesn’t look right on me), let them pile up at the bottom or drag on the floor, or let them sit in my closet for years.  Normally, the last option is what I go with.

I know many people have the same problem with pants and just end up hemming them.  That would seem like the logical thing to do, right?  Well, I’m stubborn and too afraid to try that on my own clothes.  Usually, anyway, except for this weekend.  I had just figured out the arrangement for my craft area, so I suppose I had my sewing machine on my mind.  I had bookmarked this tutorial a few years ago, and then a fellow blogger, Kristi, posted the same one last month.  I have wanted to try hemming my pants for a long time, but I had never worked up the courage until this weekend.

I don’t know what I was so scared of because it was EASY!  And I’m a beginner at this whole sewing thing, so if I say it is easy, it really is.

I’m not going to re-post the tutorial since I did not come up with the method, but I think I need to show some proof that I actually did this and came out on the other side, not only alive, but cheering and doing my happy my-pants-actually-fit dance.  Alright!

One of the reasons I never hemmed my pants before was because I like the way they look with their original thread and many hemming jobs make the bottom of the pants look differently than they did when they were purchased (like the fabric was just folded over because it was).  This tutorial allows you to keep the look of the original hem, but seemed trickier to me which is why I avoided it.  It was not tricky at all!

hem1

I folded the pants to where I wanted them, measured the distance from the original hem to the fold and then divided it in half.  Then I refolded them to the new measurement and pinned them.  The above photo shoes a 1.5 cm fold which seems small, but I needed them taken up 3 cm total which is enough of a difference to make the pants drag on the floor.  It was more difficult to sew this pair since the pins were hanging off, but it still made such a difference that it was worth it.  My longest pants needed to be taken up 8 cm (I measured in centimeters because the lengths are so small that I could measure more accurately with the metric system).

hem2

Here is my hem (white thread) next to the original.  I love that I could use any color thread I had on the sewing machine since it is hidden by the end, however, it would be best to use a stronger thread (I didn’t have any on hand).

When you cut off the extra denim at the bottom and flip the cuff back down, you have a small fold above the hem that is invisible once ironed.  It’s amazing!

I’m liking these before and afters (I should have ironed them all completely which is why it still appears that they are bunching up in the after photos but they are the perfect length)!

before1after1


before2after2


before3after3


before4after4


No more cuffing for me!  I’m in love with my “new” pants that have sat in my closet since I bought them.  The best part was that it only took me an hour to do all 4 and would take me even less time now that I know what I am doing.

What body ailment keeps you from looking your best and what do you do about it?

Monday, October 3, 2011

A Fall Tablescape on a Frugal Dollar

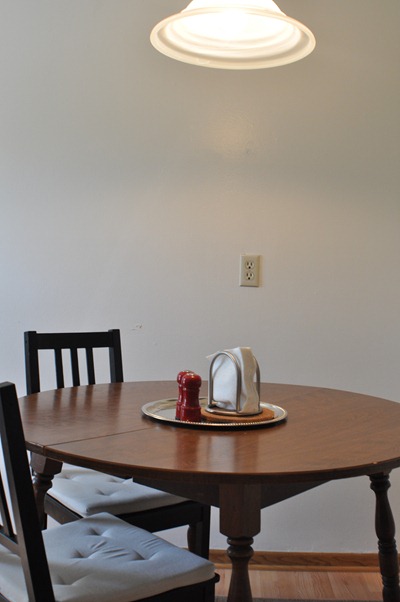
I’ve been really sick of sitting at this beat up $7 Goodwill table with only two chairs (because we are still too frugal and lazy to buy new desk chairs, so the dining chairs are being used for now leaving us with only two in the kitchen).  It’s looked like this for too long:

DSC_0014

I like having our salt and pepper and napkins on the little tray so we can easily move them off the table when we have to use it for crafting or to surf the web, but because the kitchen has barely been decorated, this tray looks lifeless and boring.  It was time to put my thinking cap on and get to work at changing that!

DSC_0016

I wanted something with more height that I could easily change up from season to season or when we have a themed dinner night.  I found this hurricane vase tutorial and knew it was perfect.  I stopped by the local Dollar Tree and Goodwill and came home with five vases and three candle holders (the three vases are just resting on the candlesticks so I could envision the final product).

DSC_0019

I soaked the glass pieces in the sink and very easily removed the labels.  When they were dry, I added Gorilla Glue to the candle holders and planted them firmly on the bottom of each vase.  Then I put some books on them to act as a clamp so they would dry correctly.  I will admit, this was my first time using Gorilla Glue, so I put way too much glue on that I had to scrape off.  I may or may not have cut a slice of my finger off with an exacto blade . . .  Just be careful not to put too much glue and then you won’t need to use any kind of blade.

DSC_0044

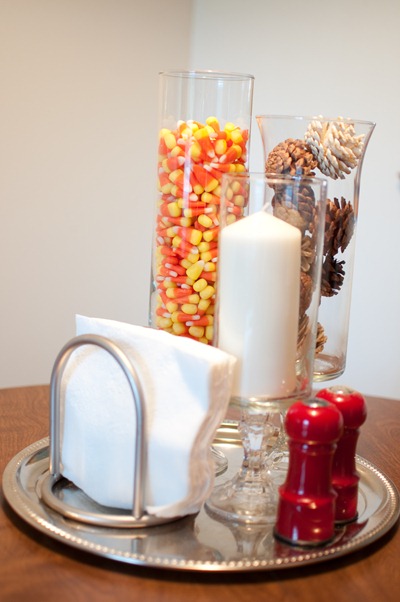
I used the leftover candy corn from my wreath project, some pinecone vase filler from Target (that I can use in fall and winter), and a cheap IKEA candle.

Much better!

DSC_0460

I am so happy to have some versatile pieces I will be able to use forever, and all on a frugal dollar!

What inexpensive fall decorating have you been doing?

LinkWithin

Related Posts Plugin for WordPress, Blogger...