Showing posts with label organization. Show all posts

Wednesday, January 18, 2012

Guest Posting at Crazy Ever After

I'm in love with a fellow Minneapolis blogger’s blog.  Lauren of Crazy Ever After is hilarious, energetic, completely honest, and seriously sweet.  We’ve been emailing back and forth for the past week about home-buying in the area, and she has been a huge help to Mr. Converse Sneaker and me!  She generously asked if I’d take part in her “De-Clutter the Crap Initiative” which are posts designed to help us busy people stay organized.  I jumped on board in a second!


declutter

I’m rambling today over at Crazy Ever After about how we keep our tiny and poorly-designed rental kitchen neat and far from chaotic.

Our Crazy Ever After 

Please join me over there and take a look around Lauren’s blog!

Tuesday, January 10, 2012

A Little Spring, I Mean New Year Cleaning

Purging isn’t pretty, folks.  It’s so ugly in fact that it could possibly maybe almost make a certain redheaded perfectionist in ruffled flats freak out a teeny tiny itsy bitsy bit.  Not me, of course, but some other person just like me.

Tell me, if your home looked like this for three days straight would you go a little crazy?

purge1

purge2

purge3

2011 was a huge purging year for us.  We combined all of our stuff, purged all of the duplicates and things we didn’t use anymore, and then did this again a few more times after bringing home wedding presents and reorganizing our laundry/storage room.  Well, when we brought home Christmas presents after being away for a week and a half, we were not happy with how our home was looking.  Our first full day back (New Year’s Day), we purged until we couldn’t purge anymore.  The above shots show what our home looked like during this three-day process.

After Thanksgiving, I came home with a few tubs full of decorations left over from our wedding, such as the many vintage jars/vases/pots/etc. that we used to hold flowers on all of the reception tables.  I was sick of them sitting in the middle of the laundry room that Mr. Converse Sneakers now uses to do a punching bag workout in, so we went through every item and kept only those that we loved the most.  We also went through the following areas in our home:

  • Every box in the laundry/storage room
  • Our closets
  • Ever cabinet in our kitchen
  • Our pantry closet
  • All boxes in our living room entertainment stand
  • Our office

So, we basically went through all of our belongings, ready to get rid of anything that didn’t fit.  As we were going through everything, we asked the following questions of each item:

  • When did I last use this?
  • When will I use it again?
  • Will this be essential/come in handy when we buy our first house?
  • Will this sit in storage when we buy a house?
  • Could I easily replace this for cheap if I got rid of it and needed it later?

I definitely have to be in the right mindset when I purge.  Last year, I was a tad too sentimental since we had just gotten married that I did not want to let go of as much.  However, the new year brought in a new cutthroat attitude that was perfect for purging.

Before I get to some after photos, here is an iPhone shot I snapped of our first car trip to Goodwill:

purge18

It’s hard to tell how full my car is, but it’s a station wagon with the back seat folded down, so it’s pretty crammed.  We also recycled a lot and got rid of unnecessary boxes we were hoarding, since we can easily get new boxes from Mr. CS’s work when we move.

Now, for some of the after photos.

Although I did some major reorganizing when I revamped our pantry for only $5, things were getting out of control.  We just had too much stuff in there that it was never easy to put anything back in its designated spot.  Here is a tiny peak at what it looked like – just imagine utter chaos every time we opened the door.

purge6

Nothing was where it was supposed to be.  In addition to taking everything out of the pantry, we emptied many of our cabinets so we could move things around so not everything was being stored in the pantry.  Here is what two of the shelves looked like after:

purge8


purge9

Notice how nothing is cramped?  Now, we can easily move things in and out with room to spare.  No more perfect placement leading to randomly throwing things in there when it all comes crashing into chaos.

Here’s an in-progress picture.  Most of these items were relocated to the basement since we don’t use them enough.

purge4

While we were purging in the pantry, we decided to heavily focus on our corner cabinet in the kitchen as well since it has a lot of space with the lazy susan.  Here is how it looked before:

purge5

Definitely not bad, but not great either.  After laying everything out, sorting, and putting things back, it looked like this:

purge11

It may look more cluttered now, but everything has a space and is organized by type (much-used cooking items on the bottom, baking items in the middle, extra spices and protein shake items on top), making it much easier to keep track of and keep organized.

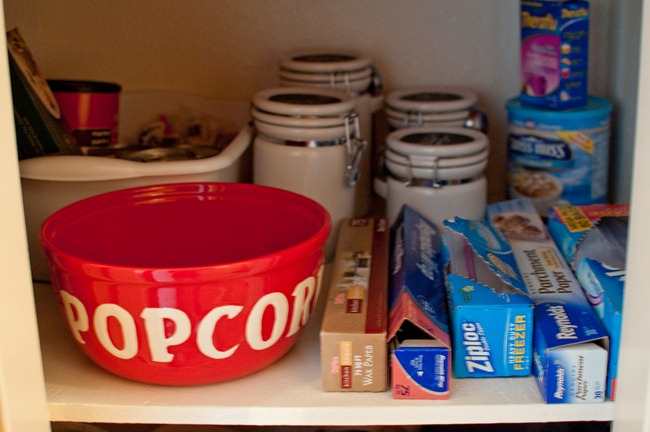
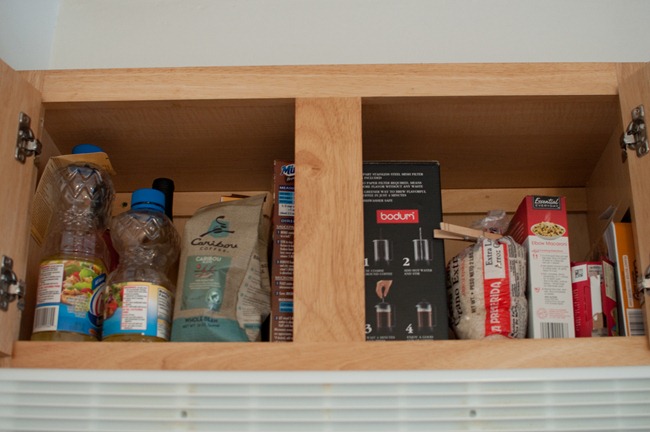
One poorly-used space was the cabinet above our range/microwave.  It housed canisters of flour, sugar, baking powder, and brown sugar as well as left over spices and for some reason some inexpensive Ikea flower pots.  Don’t ask me why they were there, I have no idea!  Since we are very short, we have trouble reaching anything in the back of that cabinet, so we relocated the canisters to the pantry (seen in the photo if you scroll up with the red popcorn bowl) and the spices to the corner cabinet shown above.  We relocated much-used and easy-to-grab items to this cabinet such as Mr. CS’s new French press (he’s a coffee snob now), snacks, and oft-used carbohydrates and cooking oils.  Oh, and wine.  We don’t drink it often, but we wanted it to be easily-reachable whenever we have a really bad day and want to pour ourselves a glass or two.

purge12

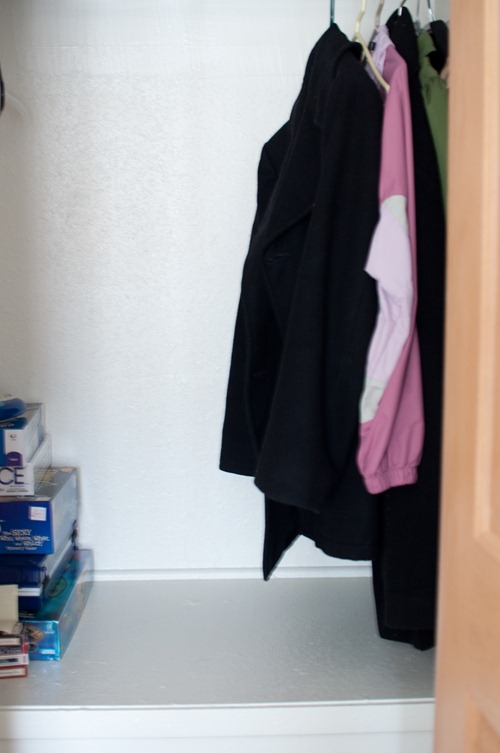
While we were tackling the kitchen, we couldn’t help but notice the coat closet that was running over with games.  See?

purge7

A simple little purge and reorganization did the trick.  Now you can barely see the games behind the door way.

purge10

In addition to these updates, I also got rid of about twenty-five items in my closet that I was not wearing and probably never would.  However, I added about the same number of items, but all are to be worn as teaching apparel (more on that in a future post).

Now, for the big room that contributed to most of our donation pile: the laundry room.  You can see photos from our first major purge and reorganization of this room here.  Since then, we added some interlocking floor tiles to make Mr. CS’s workouts a little less painful on this joints.  I like stepping on it when I’m doing laundry.

Here it was in November:storageafter5

And, here it is now:

purge13

Some major things we got rid of: the dresser that was empty after purging, our standing mirror (sad, but we don’t have a use for it now and don’t like how much room it takes up as opposed to a hanging mirror), and tons of empty boxes. 

purge14

We had so much space left over that we were able to make a little storage area for all of our newly-acquired Christmas items that were clogging up floor space after Christmas.  It’s in the area next to the water heater and under our upper art storage.

purge15

Our kitchen-overflow bookshelf dwindled down after the purge.

purge16

We also had leftover space in our shelving unit for the leftover interlocking floor tiles and our camping chairs. It doesn’t look that great still, but it’s a storage room.  I can’t ask for much more.  Now, it’s organized, clutter-free and full of space for Mr. CS to workout and me to do laundry in peace.  I’m no longer afraid of going in there!

Whew!  All of those words and photos just to say that we got rid of a lot and are now living happily with less!  I’m glad we got this out of the way now because spring cleaning will be a breeze (hopefully).

Did you take on any major organizing projects already in the new year?

Wednesday, November 16, 2011

Maximizing Storage Space in our Laundry Room

Last week I grew some you-know-whats and worked up the courage to “unveil” our disaster of a laundry room.  I hesitate to even link back to in fear that you will run away screaming.

Okay, so maybe it’s not that bad, but just keep in mind that when I picture what a laundry room should look like, I picture this:

dreamlaundry

I know, right?  Who actually has a laundry room like that?  I blame Pinterest for oozing these easy-to-hate-they’re-so-beautiful rooms that make me scream in fear when I see the reality of the rooms I’m living with.  Now, I exaggerate.  I am so thankful to have our apartment, with it’s space, it’s two levels, its cute finishings, and it’s very large laundry room with room for storage.  But I would be lying if I told you I wasn’t panting in anticipation for a laundry room like the one above when we buy a house.

All that to say, you can imagine why I was not thrilled every time I went to wash another load of whites (who knew chefs wear lots of white?) in this room:

storage1

Blech!  With all of our precious items that we can’t store anywhere else spilling out into the middle of the room, we decided enough was enough.  Thanks to our new cash budget envelope system, we budgeted $100 to whip this room into shape and then saved the rest of our paychecks for groceries, gas, and bills.  We actually saved a great amount of money last week just by telling our money where to go!

Anyway, we knew we wanted some sort of storage rack, but it had to be large and sturdy enough to hold a good amount of our items.  Places like Target and Home Depot just didn’t have what we wanted in our price range.

They had a decent amount of items like this (plastic):

option1


and this (metal):

option2

but we were thinking of something more like this:

option3

The first two options just were not wide enough for the amount of storage we wanted, with dimensions of 72.0 " H x 36.0 " W x 18.0 " D.  They were good prices, though, ranging from $45 to about $65.  However, we wanted something strong, built to last, that we could easily bring along to our first house, which the other two might be able to do, but aren’t as promising as the last photo.

Although we had been regretting ever getting a membership since we don’t use it often enough, Sam’s Club stepped in and saved the day.  We found one just like the one in the bottom photo above for – wait for it – 60 smackaroos!  It was actually a little cheaper than the metal Target shelving unit.  I would say we actually paid for our Sam’s membership and more, since the seemingly almost-identical version pictured in the photo above costs about $300!  Yipee!

Now, let’s get to the after photos I’m sure you are waiting for.  Please don’t expect some ah-ha moment, since all we did was install the new unit and move stuff around.  It’s no prettier in there, just clutter-free, and I can live with that.

WASHER/DRYER WALL BEFORE:

storage2

WASHER/DRYER WALL AFTER:

storageafter2

BOOKCASE OF WEDDING PRESENTS BEFORE:

storage4

BOOKCASE OF WEDDING PRESENTS AFTER:

storageafter4

BACK WALL (with dresser) BEFORE:

storage3

BACK WALL (with new storage unit) AFTER:

storageafter3

You’re clapping right now, right?  It’s not just me, right?  You’re still reading this, right?  Can you believe we had all that extra stuff in the middle of the floor?  No wonder I started pulling my hair out!

And now . . .

WIDE SHOT BEFORE:

storage1

WIDE SHOT AFTER:

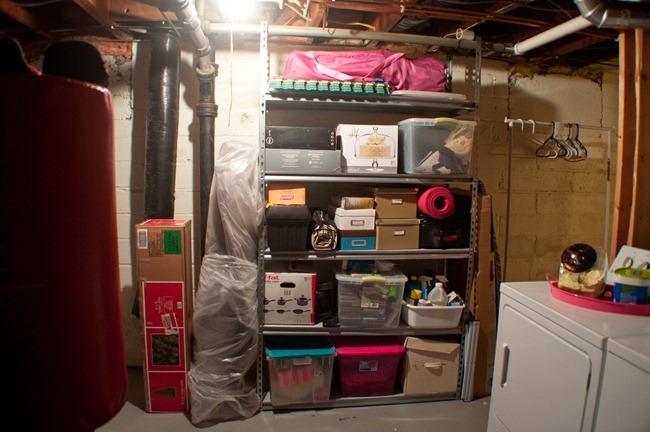
storageafter5

Ahhhh!  If you followed along closely, you are probably wondering where the office chair, exercise ball, fan, and mirror went.  I didn’t take an after shot of beneath our stairs since it actually became a little more cluttered when I moved those bigger items over there, but they are hidden from view unless you walk back there, so I thought it was the perfect place for them since that area was hardly being used.

So, what do you say?  It may not be beautiful but it definitely is organized and usable again.  Now Mr. Converse Sneakers can get his kickboxing on with plenty of space.  I wouldn’t want him doing a round house kick into our aqua Christmas ornaments or doing jab cross combo into our beloved cake stand.  Everything now has a place and I can breathe a little easier!

What space in your home do you need to organize?

Monday, November 14, 2011

A $5 Pantry Makeover

While focusing so much on our main living spaces, a few other places started falling by the wayside.  One of these spaces was our tiny pantry.  Most of our kitchen appliance are hibernating in our basement storage room since we don’t have space for them in the kitchen or pantry and we don’t use a of them right now.  Once we have a bigger kitchen, we plan on using the heck out of all of them, but for now they are waiting for a special day when we will pull them out.

Our pantry mainly holds our food, miscellanious kitchen supplies (ziploc bags, tin foil, clothes pins for bag clips, etc.), and our commonly used kitchen appliances.

This is what our pantry looked like before:

pantry1

Yikes, right?  The top shelf in the photo is our roommate’s – he doesn’t cook as much as we do, so his shelf is pretty bare.  Our food self is below that, which overflows into our extra storage shelf below.  There are two other shelves (the very top and bottom) not pictured which were pretty organized since we don’t use them as much.

I pulled everything out of our two main shelves so I could sort them.

pantry2

We picked up some inexpensive (I think they were about $1.90 each) white bins to corral the items.

Here is the beautifully organized after:

pantry3

We basically reversed what we had.  Food is still on top, but after organizing and sorting everything, we had room for some of the things on the bottom shelf, which meant we could fit more from other unorganized places in the kitchen in the lower shelf!  I love it when that happens!

Here’s a closer look:

pantry4

Breakfast/baking on the back left, canned goods in the middle in the back, Other everyday foods in the back right.  Everyday boxed kitchen items on the left in front, my favorite popcorn bowl I use all the time in front, and some random foods/medicines on the right.

pantry5

Vases/glassware in the back (not viewable in the photo), random things like my lunch bag, grater, straws, and skewers in the front bin, and then oft used things like our casserole dish, large skillet, food processor, and splatter screens.

I love that this only took about ten minutes and was under $10 to do!  I have some crazy fascination with organizing things, so this actually energized me.  I often open the door and stand in awe when I should be praising my man as he cooks (since he is sweet and does 99% of the cooking around here while I tell him how awesome he is).  As much as I love how organized this is, though, I cannot wait to have a kitchen with real space for all of our kitchen appliances and food, since when kids come along in a few years, I know we are going to need all the space we can get for supplies and food.

How do you keep your food and kitchen supplies organized?

Tuesday, November 8, 2011

Unveiling the Catch-All Room

Have you ever moved into an apartment or house and used one room as a catch-all room for those extra things you don’t have room for?  When we went apartment hunting, we knew we needed an apartment with extra storage, since we would be combining all of our stuff, finding a place for our wedding presents, and storing out-of-season things close by.  We didn’t want to rent a storage space, since most of the stuff we keep in storage are things we use, just not every day, so we want easy access to them at any time.

We were beyond excited when we found our apartment which includes a HUGE storage/laundry/utilities room.  We never thought we would be able to fill the room, but as time has passed, we have made great use of the living space we have, but have done a horrible job in the storage room.  We got rid of a lot when we got married and combined all of our things.  But, we received tons of wedding presents, which we are incredibly grateful for and will use, but we cannot keep all of them out right now.  Since Mr. Converse Sneakers is a chef and both of us are huge foodies, we received mostly kitchen-related presents.  Our kitchen is majorly lacking in storage space, the pantry is overflowing (which I hope to do something about and will keep you posted on when I get around to it), so we dedicated a whole bookshelf in the storage space to our wedding presents, just so we can access them easily when we need them.

We also have been purchasing Christmas decorations and other things that have filled up the space, such as wedding leftovers (which half of are still being stored at my parents house and will be coming back with me shortly meaning even less extra space in there) and a punching bag Mr. CS bought to change up his workout regimen an release stress.  Even after getting rid of a lot, we are left with much less extra space than we had when we first moved in.

I decided we need to tackle the storage space in there – and fast – because it’s just going to get worse as time goes on.  One of my first steps for getting something major accomplished in our apartment is to blog about it, so that I have people waiting for an update which is much more pressure than actually living with the lack of adequate storage.

So, today I am going to share photos of our storage room.  I deliberately didn’t even lift a finger in there before I took the photos so you could see how badly it is working for us right now as we are currently using it.

Please don’t judge me for how horrible it looks and the poor photos (the lighting in there is subpar).
Here we go . . .

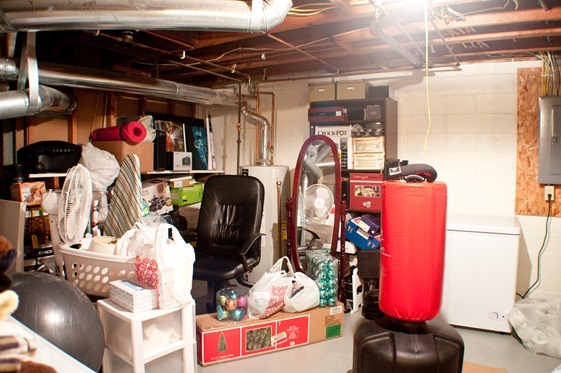
storage1

Along the wall to the left of the photo is a built-in shelf.  We have tons of things stored on it and below it (which you can’t even see with all the crap in front of it), such as leftover art, empty boxes for when we move again, leftover office things we don’t use every day, a file cabinet, tools, workout equipment we rarely use, and so on.  In front of all of that are laundry baskets, Mr. CS’s office chair which we will probably use again in a future house, Craigslist Christmas scores (ornaments, pine cones, a tree, lights, and some accessories), an exercise ball, a full-length mirror, and a punching bag.  Behind the punching bag is our big freezer we barely use, but hope to use more (luckily it only uses about $15 to power for the whole year).  To the left of the freezer is the bookcase that holds our wedding presents.

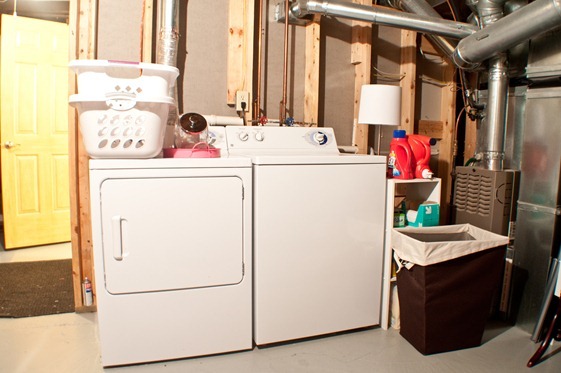
storage2

The wall to the side of the main storage wall is our washer and dryer.  We don’t have enough towel storage, so there the extras sit.

storage3

The wall the runs along the back of the apartment has cleaning products, paint, bulk items like soap, and an old dresser with some craft supplies, irons, and other miscellaneous makes-no-sense things.  The bag hanging off the wire shelving is our makeshift garbage bin, I guess.  To the right of all of that is a hanging rack where we dry our delicate clothes.

storage5

If you scroll back up to the photo with our washer and dryer, you can see the door that leads to this room.  That door is connected to our basement bathroom, which is inconvenient but something we have to live with.  Beyond the door is extra storage under the stairs.  We keep some extra exercise equipment and an unused laundry sorter.  You can see by the rust stains in the bottom left corner which used to have some metal weights that we have some water problems in here.  It has never been very bad, but when we have heavy rain, some water will make its way into that corner, which is something that urges us to have better storage just in case it ever rained so hard the whole room flooded.

I don’t know if I feel relieved or mortified to have shown you our hard-on-the-eyes catch-all room, but it’s done.  Now we need to tackle this room before these photos are permanently fixed in your minds and you start to think horrible things about me and my non-organizing ways.

I’m off to scout out affordable temporary storage ideas!  Wish me luck!

Monday, November 7, 2011

Storing Books in Style

I have trouble with clutter.  Our home gets cluttered often because we are not home enough to organize constantly, nor do we have lots of space to keep things nice and organized.  I am a tad OCD, however, when it comes to clutter, because I cannot think if I’m in a cluttered room.  If I have to write a paper or read for school, the room I am in needs to be clutter-free, meaning no random things on the floors or furniture.  Everything needs to be put away.  I am okay with stacks of what I like to call “organized clutter” which is what I do when I go into school/homework mode and need a clutter-free room quick.  I take the clutter and organize it by category into a pile and put the pile somewhere I can’t see very well.  This doesn’t solve the clutter issue, but it makes it manageable for the time being.

Somehow, my rambling really does connect to our bookcase in our living room, I promise.  The current styling of the bookcase was done with little thought, and to me looked like a big case of clutter, which is the opposite of how I think a bookcase should look.

See what I mean?

bookcase1

So, I admit that in photos it doesn’t look that bad, but the rest of the living room is fairly neutral with pops of colors whereas the bookcase is one giant blob of tons of colors.  I find it distracting when I am trying to get anything done in there because it looks like a cluttered mess to me.

I decided to style it differently.  I would love to not even have the bookcase in this room because I would much rather have a whole wall of bookcases in an office or library where I could stand all the books because it would make sense, but that is not an option for us.  I didn’t even think about covering all the book because, although the room would feel a lot more peaceful, I would go insane covering them since I have hardly any time lately and that would be a huge undertaking.

Instead, I sorted the books by color, moved some to our entertainment stand with concealed box storage, and added a few more nick nacks to make it more homey and fill up the extra spaces.

Here is the after shot:

bookcase2

While the colors still bother my eye, they are now organized and styled better, so I can live with it.  Part of apartment living (or any living, I suppose) is doing the best with what you have.  I could definitely buy some accessories that would fit our style more to make everything look better, but we don’t plan on living here for a long time and would rather wait until we have a style for a future home.

Let’s get a closer look at the shelves:

bookcase3

I love my ornate frames!  The one on the top shelf holds a postcard of the Minnesota state fair.  the biblical wooden quote was a gift from San for one of our anniversaries.  The candle accessory on the second shelf was a wedding present.  I do like that the pops of red help balance our new lamp shade I covered.

bookcase4

The third shelf from the top has a blue mason jar with our loose change, a photo of us with our two friends, Courtney and Pat, at our junior prom (crazy that we’re now married couples and they have a baby).  the stack of vintage pop cans (yes we say pop here in Minnesota) were purchased on our honeymoon in Duluth, Minnesota.  They’ve been in storage, so I threw them in since we love them so much.  I want to use them as flower vases in our first kitchen once we buy a house.  The second shelf has a wooden plaque that says, “Friends are the family one finds along the way,” which was coincidentally a present from Courtney for my birthday.  I love all of the sentimental touches even if it still looks a little cluttered!

Now, I want to know if you style your bookcases or if you let the books accumulate and enjoy the collected look?

Wednesday, October 12, 2011

A Low-Budget Bedroom Wall Turned Office

After a few weeks of bribing you to come back to see the progress we have been making in our bedroom, I can finally say that this room is getting closer to being done.  The biggest task we have took on so far is completed for now, until I decided to make a tweak here or there.

What am I talking about?

Well, thanks for asking!  Sometimes I ramble on without making any sense.  You’ll have to excuse me from time to time.  Mr. Converse Sneakers and I worked really hard brainstorming a way to incorporate a fully-functional organized (and pretty) office space into our bedroom.  Since the only other living space we have domain over (our roommate gets to dictate what goes on in the upper bedroom, living room, and bathroom) is our downstairs living room which has zero extra space for both of us to use as an office space, the bedroom was our only option for converting.

Let’s take a look at where we started.

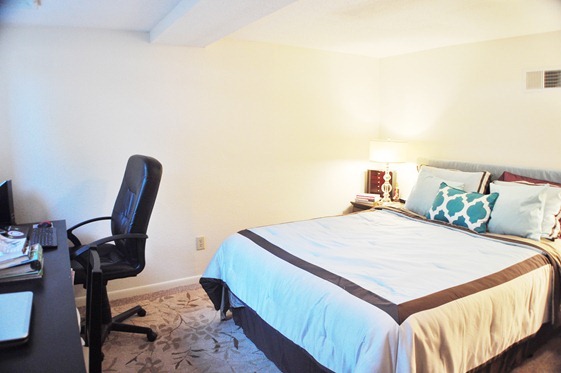
In August, our bedroom looked like this:
DSC_0265

DSC_0277

We were smart and invested in a long desk from Ikea, but the placement was off.  We really liked the bed on the back wall because it was perfectly centered, but the desk area made no sense.

A couple weeks later, the room took on a new arrangement.

DSC_0519

DSC_0522

We moved the desk along the back wall, added a skirt, and placed the bed on the wall opposite the door.  We had to nix one nightstand and temporarily replace it with that hideous green storage stand because of a pesky step built into the floor (seen in the upper photo above) making our lives a decorating nightmare.  This layout made much more sense, but it did not provide any more storage for our office supplies.

I posted many ideas a little while ago that served as inspiration for our office space.

If I had to choose the two ideas I took the most inspiration from, I would choose this one (below) because I loved the symmetry of the desk in between the shelving units . . .


. . . and this one (below) because of the shelf, color, and cute storage ideas.


Now, drumroll please, here is what our office area looks like now:

office10

Much better, right?  Here is a shot of it straight on:

office8

We definitely combined both of the inspiration photos to come up with our own custom look.  We centered the desk on the wall, added two Ikea Expedit shelving units with three storage boxes (similar in price and look to the Ikea Drona boxes – I cannot find the name of these specific Ikea ones anywhere).  We also added an Ekby Jarpen shelf held up by beautiful curvy Ekby Hensvik brackets.  We used a lot of Ikea products, which we probably wouldn’t normally do because we like a little less modern aesthetic, but the price was right!
office5

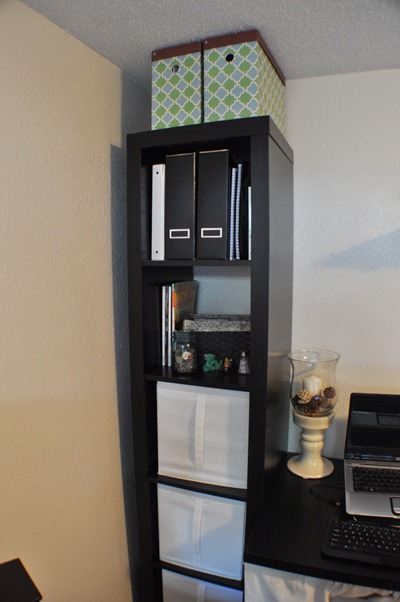
The left side is Mr. CS’s side.  The three storage boxes hold electronics (GPS, Nikon DSLR, Sony point-and-shoot, chargers, etc.), various paper items (envelopes, notepads, stamps, notebooks, etc.), with one box almost empty still (yay for overflow space).  The second to top shelf holds a few nick nacks that my hubby loves, a blue mason jar holding coins, a few magazines, and a basket I demanded he keep his keys, ipod, and other everyday items he usually leaves scattered around the apartment.  The top shelf holds some of his things like recipes (since he is a chef and a huge foodie), more magazines, a planner, and a notebook.  We bought the most awesome hanging file bins from Target that are housed on top of the left shelving unit. One is for my papers and one is for his.

office4

To make our lives easier once we find new, smaller nightstands that probably won’t have any drawers, we are using the bottom two storage bins for things like socks and under garments.  The top storage bin houses some of my photography business products like DVDs, business cards, and large envelopes.  The second to the top shelf holds some of my books and my new beautiful camera bag.  We bought a large gray hanging file bin to hold our important papers we need on hand.  The rest of our paper storage is held in a file cabinet in our laundry/storage room (which I am still not brave enough to show you).  I store my school books and a few miscellaneous books in a silver tray on top of the shelving unit.

office12

We are still working out the details with the contents on the shelf, but for now we store some books and use the rest of the space as an area to add pretty details like our ornate pink “S” and a blue frame with one of our engagement photos in it (the frame was a birthday present from Mr. CS a few years back and I still love it).  We cannot use every inch of space on the shelf because the only vent in the room lands right above the shelf.

office11

Below the shelf, I used items we had on hand (two cork squares and a dry-erase board) to create a quick-reference area for notes, reminders, birth announcements, wedding invites, and any inspiration we come by that we want to showcase.  Fun fact: the purple card on the right cork square is the exact card I gave Mr. CS the last day before Christmas break our senior year of high school.  I ended the card with, “If you asked me out right now, I’m not sure I would say no . . . Anyway, have a great Christmas break!”  Such funny memories – that was the card that started this beautiful relationship!


office1

To divide our desk areas, we keep charcoal paper drawers that store our everyday supplies (like white-out, rubberbands, staples, dry-erase markers, etc.) and paper for the printer.  In a mug I bought my hubby a few years ago with picture of various desserts he made at culinary school, we keep pens, pencils, and scissors.

office13

On top of the paper drawers, we keep a floral bin that stores our external harddrives.  On top of that, we bought a stylish letter sorter to keep recent bills, letters, and lists we need to look at in the near future.  Years ago, I made the two floral decorative boxes out of greeting cards with my grandma, which now hold our tacks and paper clips.  I love them!

office7

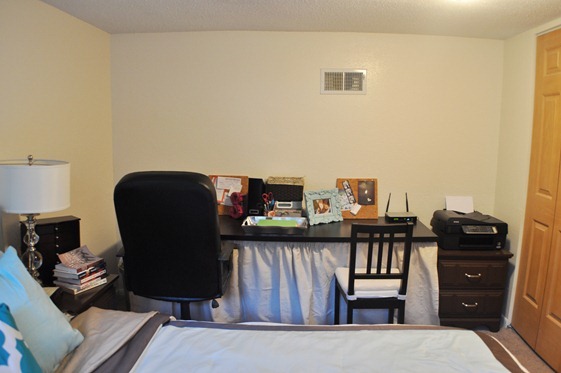
The one solution I had the hardest time coming up with was where to keep the printer.  It is too big and chunky (not to mention not very pretty) to keep on the desk.  It is too big to fit on either the shelf above the desk or the side shelving units.  The only solution I could come up with was to keep it under the desk.  It’s wireless, so all we have to do is turn it on when we want to use it.  After a week of keeping it there, it has worked out perfectly!  It might not work for all, but it works for us!

Let’s recap the before and after one more time:

BEFORE

DSC_0265

AFTER

office10

BEFORE

DSC_0522

AFTER

office8

What do you think?  Do you have a room that doubles as two rooms in the way it functions?

LinkWithin

Related Posts Plugin for WordPress, Blogger...